A steampunk costume is a Victorian outfit with the workings of an imagined machine age added on top: brass, leather, goggles and gears. That sounds expensive, and a complete steampunk outfit bought new can be. But many of the best steampunk costumes at any gathering were put together for very little, from clothes people already owned, finds from charity shops and things made at the kitchen table. Some would say the home-made ones look better, because they have a character and a story that a costume from a packet does not.
This guide is about doing it that way. It starts with what a steampunk outfit really needs and what it can manage without, then works through your own wardrobe, charity shops, simple alterations and home-made goggles and gears, with the safety points for glue guns, craft knives and paint. It ends with a plan for putting a whole costume together in a weekend. For the ideas behind the style, see our complete guide to steampunk fashion.
What a costume needs, and what it can do without
The quickest way to save money is to be clear about which pieces are doing the work. A steampunk costume reads as steampunk from across a room because of a few things, and almost everything else is a bonus.
What it needs
- A Victorian shape. For a man, a shirt with long sleeves, trousers that sit high, and a waistcoat. For a woman, a high-necked blouse and a long skirt, or a dress, with a waistcoat or a corset belt. This base is what makes the outfit look as if it belongs to the 1800s, and without it no amount of brass will help.
- Something on the head or the eyes. A hat, a pair of goggles, tinted round glasses, or all three. People look at the head first.
- One or two working details. A belt with a pouch, a pocket watch on a chain, a leather strap with a buckle, a brooch made of cogs. These are what turn a Victorian outfit into a steampunk one.
- Boots or plain dark shoes. Trainers spoil everything above them.
What it can do without
- A coat, if the waistcoat is good. Many steampunks take their coats off by lunchtime anyway.
- Real brass and real leather. Paint, card, faux leather and old belts do the job at a few steps' distance, which is how most people will see them.
- A bustle frame or a full corset. A skirt bunched up at the back and a wide belt give the same line for a fraction of the effort.
- A prop weapon. Many events have rules about them anyway, and they are tiring to carry all day.
- Every accessory at once. Restraint looks better than a costume covered in cogs, and it costs less.
A useful test is to stand in front of a mirror and ask what the costume says about the person wearing it. If the answer is "an inventor", "an explorer" or "an airship captain", it has what it needs. If the answer is "someone who likes gears", it has too much of the wrong thing.
Start with what you already own
Before spending anything, empty the wardrobe onto the bed. Most people already own half of a steampunk outfit without knowing it, because the base is made of ordinary clothes in plain shapes and quiet colours.
Things to look for at home
- A plain white, cream or pale shirt with long sleeves, or a blouse with a high neck.
- Dark trousers from an old suit, or plain work trousers in grey, brown or black.
- A waistcoat from a three-piece suit or a wedding outfit.
- A long skirt in a dark or muted colour, or a long dark dress.
- Boots of any kind in brown or black leather, or plain dark shoes.
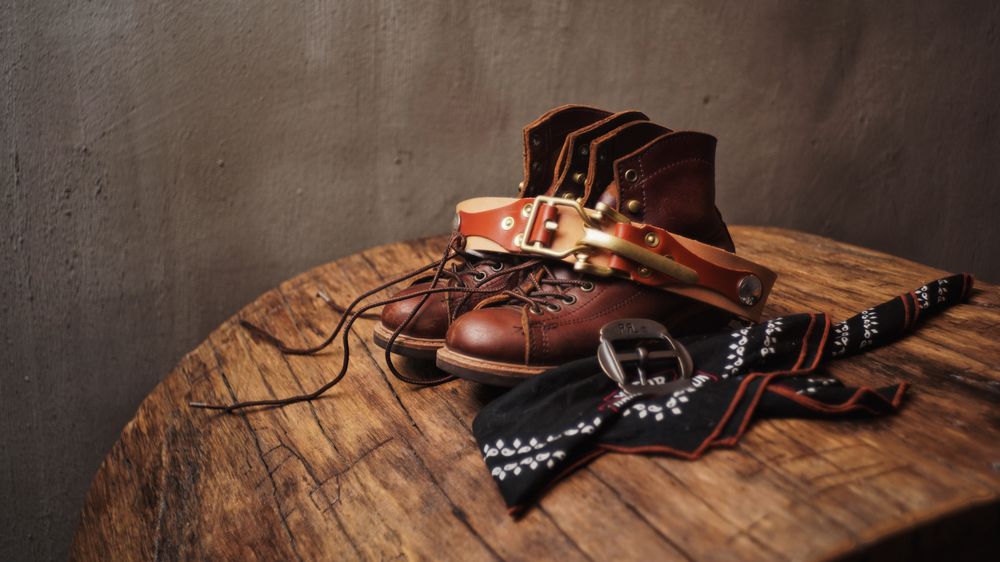
- Leather belts, especially wide ones and ones with brass buckles.
- Scarves, which can be tied as a cravat or a neckerchief.
- Any hat with a brim, and any old brooches, chains, keys or lockets.
- A long dark coat, a blazer or a tweed jacket.
Ask before you buy
Family and friends are the next place to look. Older relatives often keep suits, waistcoats, hats and handbags they no longer wear, and someone who goes to weddings will have a waistcoat in the back of a cupboard. Ask before you cut or paint anything you have borrowed. Swapping with other people who dress up, or with a local sewing or drama group, also turns up pieces that cost nothing.
Plan the gaps
Once you have laid everything out, choose a character, such as an inventor, an aviator or an explorer, and write a short list of the pieces still missing. A list keeps the next step cheap, because it stops you buying things that look fun but do not belong to the outfit. Our guides to men's steampunk outfits and women's steampunk outfits list the pieces for each character.
Charity shops, and what to look for
Charity shops are the steampunk's best friend. They sell real wool, tweed, leather and linen, often in the slightly worn condition steampunk likes, and the money goes to a good cause. The trick is to look past what a garment is now to what it could become.
For the base
Look in the men's suits for waistcoats, which turn up on their own when a suit has been split, and for trousers in wool or tweed. Long skirts in wool, corduroy or heavy cotton, and blouses with high necks, lace collars or pin-tucked fronts, are worth picking up whenever you see them. Women should look in the men's section too, and men in the women's: a man's waistcoat suits many women, and a woman's long velvet coat can make a fine frock coat for a slim man.
For the coat
A dinner jacket or a long dark overcoat can become a frock coat with very little work. A tweed jacket suits an explorer or a traveller as it is. A military-style jacket with a double row of buttons suits an airship officer once the buttons are swapped for brass ones. The coat is the largest piece of most outfits, so it is where a second-hand find saves the most.
For the details
Old leather belts and handbags give straps, buckles and pouches. Old costume jewellery gives brooches, chains and charms. Old curtains and cushion covers in velvet or brocade give fabric for a waistcoat, a sash or a hat band. Look for old keys, small brass ornaments, compasses and broken clocks too, for the gears inside them; there is a safety note on old clocks in the section on making things below.
How to shop well
- Read the label. Wool, linen, cotton, velvet and leather look right. Thin, shiny polyester and satin look cheap under lights and in photographs.
- Buy coats a size up, so that they close over a waistcoat or a corset.
- Look at the shape, not the buttons. Buttons can be changed in an evening; a bad shape cannot.
- Go often. Stock changes all the time, and a shop that had nothing last week may have the perfect waistcoat this week.
Turning ordinary clothes steampunk
Small changes turn ordinary clothes into a steampunk outfit. Most need only a needle and thread, and none need a sewing machine.
Change the buttons
Swapping plastic buttons for brass or metal ones is the single quickest improvement to a coat or a waistcoat. Metal buttons can be cut from old jackets, and plain buttons can be painted with a metallic paint and left to dry overnight. On a coat, a double row of brass buttons gives a military look at once.
Add brace buttons
Victorian trousers were held up by braces fastened with leather tabs to buttons sewn on the waistband, rather than by the metal clips common today. Six buttons sewn inside the waistband of an old pair of suit trousers, two at the back and two each side of the front, take a few minutes and make any pair of braces sit properly. Braces were nearly universal in the middle of the nineteenth century, so they add a real Victorian touch to almost any outfit.
Age a shirt with tea
A bright white shirt can look too new. Soaking it in strong tea for an hour or so, then rinsing it in cold water and drying it, gives it a soft, old-cream colour. Coffee gives a darker shade. Test a small corner first, and keep the shirt away from anything you would mind staining.
Take up a skirt
A long skirt can be drawn up at the sides or the back with ribbons, ties or a cord sewn on the inside, which shows a petticoat or boots underneath and gives the gathered look of a Victorian walking skirt. A second skirt bunched up over the first at the back suggests a bustle without any frame.
Add straps and buckles
An old leather belt, cut and fitted with a buckle, makes a strap for a hat, a sleeve band, a harness across the chest or a holster for a tool. Two or three wide belts worn together round the waist, over a blouse, give the look of a corset without any of its cost.
Tuck and roll
Trousers tucked into boots, or into long socks with breeches, look like an aviator's or an explorer's at once. Rolled sleeves and an open collar turn a gentleman's shirt into an engineer's. These cost nothing at all.
Making goggles, gauges and gears cheaply
The parts of a steampunk costume that cost the most to buy are often the easiest to make. Goggles, gauges and gears can all be made from household things, card and paint. Our guide to making steampunk props safely covers bigger projects.
Goggles
Goggles need two round eyepieces, a bridge between them and a strap. The eyepieces can be the lids of small jars, the bottoms of paper cups, tea-light holders or the rings from old curtain poles, painted brass or copper. For lenses, cut circles from clear plastic packaging, tinted with a coloured marker if you like, or leave the eyepieces closed if the goggles will only sit on a hat. The strap can be elastic, or a strip cut from an old belt with a buckle. Real goggles came into their own with early pilots and motorists in the years after 1903, which is why they look most at home on a hat brim or round the neck of an aviator. Home-made goggles are for looks only: never rely on them to protect your eyes, and do not walk around with them over your eyes unless you can see clearly through them. Our guide to steampunk goggles explains the different kinds.
Gauges
A gauge is a round dial with a needle. A jar lid or a bottle top makes the case, a printed or hand-drawn dial makes the face, and a short piece of wire or card makes the needle. A circle of clear plastic over the front looks like the glass. Fix one to a hat band, a belt or a wrist cuff, and it looks like part of a working machine.
Gears
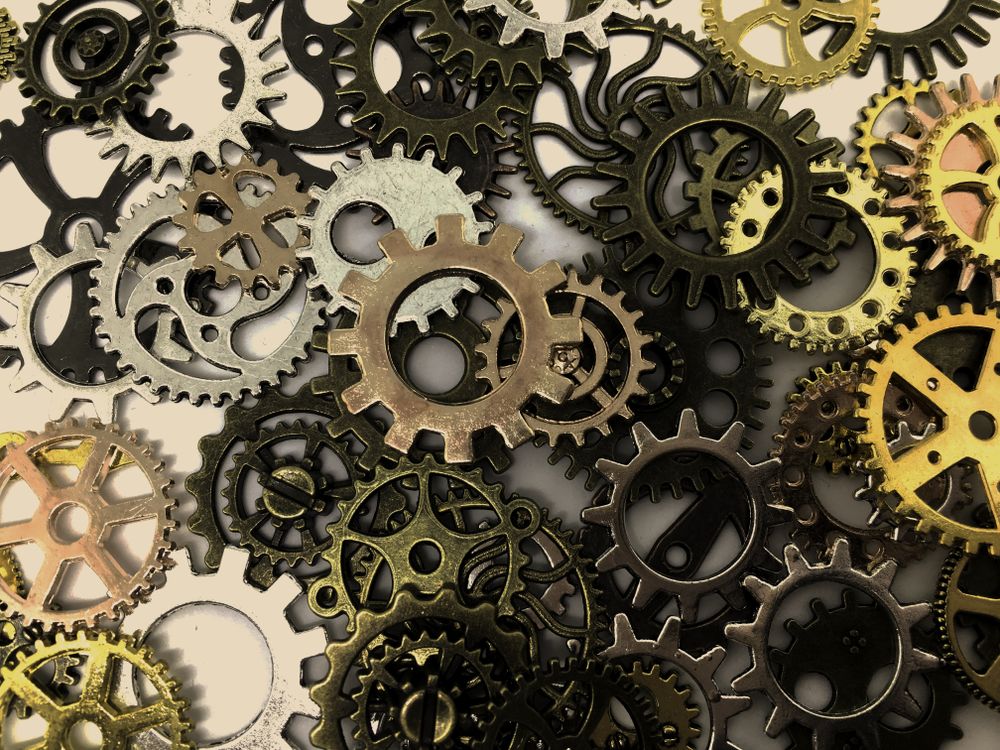
Gears can be cut from thick card, craft foam or the backs of cereal boxes, painted, and layered two or three deep for a solid look. Old watches and clocks give real ones. There is one safety point here: watch and clock dials with luminous numbers made during most of the twentieth century may be painted with radium, which stays radioactive long after the glow has faded. Such dials are usually harmless while they are intact, but they should not be taken apart, because flakes of paint can be breathed in or swallowed. Leave luminous dials whole, and take gears only from clocks and watches without them. Our guide to cogs, gears and machines goes further.
Paint that looks like metal
Card and plastic can be made to look like old brass. Paint the piece black or dark brown first, let it dry, then brush a little metallic gold, brass or copper paint over the raised parts with an almost dry brush, so the dark colour stays in the hollows. The result looks like metal that has been handled for years.
Safety while making
A few minutes of care keeps a costume project from ending in an injury.
- Glue guns. Hot glue sticks to skin and keeps burning. Keep a bowl of cold water nearby, and use a tool, not your fingers, to press pieces together. The NHS advice for any burn is to hold it under cool running water for 20 minutes, to leave anything stuck to the skin in place, and not to put creams, oils or butter on it. Get medical help for a large or deep burn, or a burn on the face.
- Craft knives. Choose a knife with a blade that retracts, cut away from your body, and keep your other hand out of the path the blade would take if it slipped. The Health and Safety Executive's advice on hand knives names cutting away from the body, and the dangers of blunt knives, among the things every user should be taught. A blunt blade needs more force and slips more easily, so change blades often, and cut on a board, not on your knee.
- Paint and spray paint. Paint with solvents gives off fumes that can cause headaches and dizziness, and the Health and Safety Executive says ventilation is always needed when they are used. Paint outdoors if you can, or with the windows and doors open, follow the instructions on the tin or can, and keep spray cans away from flames and heaters.
- Costumes near flames. London Fire Brigade warns that home-made costumes are not always safer than bought ones, because cotton, netting, felt and synthetic fabrics can all burn readily. Keep any costume away from candles and open fires.
Where to spend and where to save
A budget costume is not one where nothing is bought. It is one where money goes only on the things that cannot be made or found.
Spend on
- Boots or shoes you can walk in. You stand in them all day, and sore feet end the day early. If you already own comfortable dark boots, wear those; if not, this is the first place money is worth spending. Our guide to steampunk boots explains what to look for.
- The fit of the base. A shirt, waistcoat or skirt that fits well looks expensive even when it came from a charity shop. A shirt that is too big looks borrowed.
- One good piece. If you want to spend on one thing that people will notice, choose the hat or the waistcoat, because they sit at the centre of every photograph.
- A corset, if you wear one. A cheap corset that pinches or bends out of shape is uncomfortable and can be unsafe. A corset should never be laced so tight that breathing or moving is hard; if you feel faint, take it off. A waistcoat or wide belts are a better choice than a poor corset.
Save on
- Gears, gauges and gadgets, which are easy to make and look the same at arm's length.
- Jewellery, which can come from old costume jewellery with a cog or a key added.
- Props, which are tiring to carry and often limited by an event's rules.
- Goggles that only sit on a hat, which never need real lenses.
- Fabric, which can come from old curtains, cushion covers and clothes.
Time is the other thing you spend. A costume built slowly, a piece at a time over a few months, costs far less than one bought in a rush the week before an event.
A costume in a weekend
Here is a plan for a complete steampunk outfit, from nothing to ready, in one weekend. It assumes a character has been chosen and the wardrobe has been searched.
Friday evening: the plan
Choose the character and write it down in one line, such as "an airship engineer who has just come off shift". Lay out everything you own that fits it, try the base on, and write a short list of what is missing. Gather card, glue, paint, old belts, a jar lid or two and anything else for making.
Saturday morning: the shops
Take the list round two or three charity shops. Look first for the missing base pieces, then the coat, then the details. Buy only what is on the list, unless something perfect turns up.
Saturday afternoon: the alterations
Change the buttons, sew on brace buttons, put the shirt in the tea, and take up the skirt. Cut and fit any straps and buckles.
Saturday evening: the making
Make the goggles, a gauge and a handful of gears. Give everything its first coat of dark paint and leave it to dry overnight, in a room with the window open.
Sunday morning: the finish
Brush on the metallic paint, then fix the goggles to the hat, the gauge to a belt or cuff, and the gears where a mechanism might really be. Stop before it looks crowded.
Sunday afternoon: the trial
Put on the whole costume and wear it for an hour. Sit, stand, walk up and down the stairs, and eat something. Anything that pinches, slips or falls off will be ten times worse after a long day. Take a photograph and look at it the next morning with fresh eyes, because a photograph shows what a mirror hides.
Then wear it somewhere. For gatherings across the country, see our guide to UK events. A costume is never really finished, and most steampunks add a piece or two each time they wear it.